CentOS install
![]()
lineblocs open source is a free and fully featured cloud PBX supporting all the functionality of the lineblocs cloud version in addition to having a configuration suitable for those who prefer to run a PBX on their own servers.
in this tutorial will be going over how to install lineblocs and its minimum requirements on a base CentOS 8 image. we will be going over the installation of asterisk and apache as well as how to configure the lineblocs web app and backend tools.
by the end of this tutorial you should have a working lineblocs instance running as a linux service.
Getting Started
you will need to first update the centos 8 package manager (yum), install development tools and also disable SELinux. depending on how you installed centos this may or may not have already been done already.
to update the package manager and disable SELinux please use the following steps below:
update yum
```
yum -y update
```
install development tools
```
yum group install "Development Tools"
```
disabling SELinux
- run command
```
cat /etc/selinux/config
```
if you don't see "SELINUX=disabled" please run the following command
```
sed -i 's/SELINUX=.*/SELINUX=disabled/' /etc/selinux/config
```
followed by a system reboot
```
reboot
```
installing Lineblocs
below we will go over how to install the base dependencies for lineblocs and then how you can run the lineblocs web installer to setup the database and configure lineblocs to work with apache and asterisk.
lineblocs requires some dependencies to work. you will need to at the least install Apache 2.4, PHP 7 as well as Asterisk 16 and its dependencies. we will be installing and configuring Apache and PHP first followed by installing the base of asterisk and then setting up the networking and folder privileges required to make lineblocs run correctly.
to install Apache and PHP you please use the following commands:
install Apache HTTPD
```
yum install httpd
```
install PHP 7
we will be using the remi CentOS repo so we can install the recommended version of PHP (7.3) on our linux instance. To install PHP 7.3 on the CentOS please use the following steps:
```
sudo dnf -y update
```


```
sudo dnf -y install https://dl.fedoraproject.org/pub/epel/epel-release-latest-8.noarch.rpm
```


```
sudo yum -y install http://rpms.remirepo.net/enterprise/remi-release-8.rpm
```


```
sudo dnf -y install dnf-plugins-core
```


```
sudo dnf config-manager --set-enabled remi-php73
```


```
sudo dnf config-manager --set-enabled remi
```


```
sudo dnf module install php:remi-7.3
```


```
sudo dnf update
```
download and unzip lineblocs code in "/var/www/html"
```
cd /var/www/html
```
```
wget http://get.lineblocs.com/lineblocs-0.0.1.zip
```
```
unzip lineblocs-0.0.1.zip
```
installing lineblocs base
```
cd lineblocs
```
```
./install_base.sh
```
configuring MySQL
during the base installation you will need to setup MySQL. please make sure you leave the password blank and remove all remote logins, as well as reload all privilege tables.
```
Enter current password for root (enter for none):
```
do not enter anything here
```
Change the root password? [Y/n]
```
press "n" to this
```
Remove anonymous users? [Y/n]
```
press "Y" here
```
Disallow root login remotely? [Y/n]
```
press "Y" here
```
Remove test database and access to it? [Y/n]
```
press "Y" here
```
Reload privilege tables now? [Y/n]
```
press "Y" here
once the mariadb installation completes you will see some other dependencies being installed. be sure to let the installer run and install all the other dependencies. the asterisk configuration and installation should take 3-5 minutes to complete.
the installer will show the asterisk menuselect options once asterisk has been successfully configured. please select the default settings here and then use "Save & Exit".
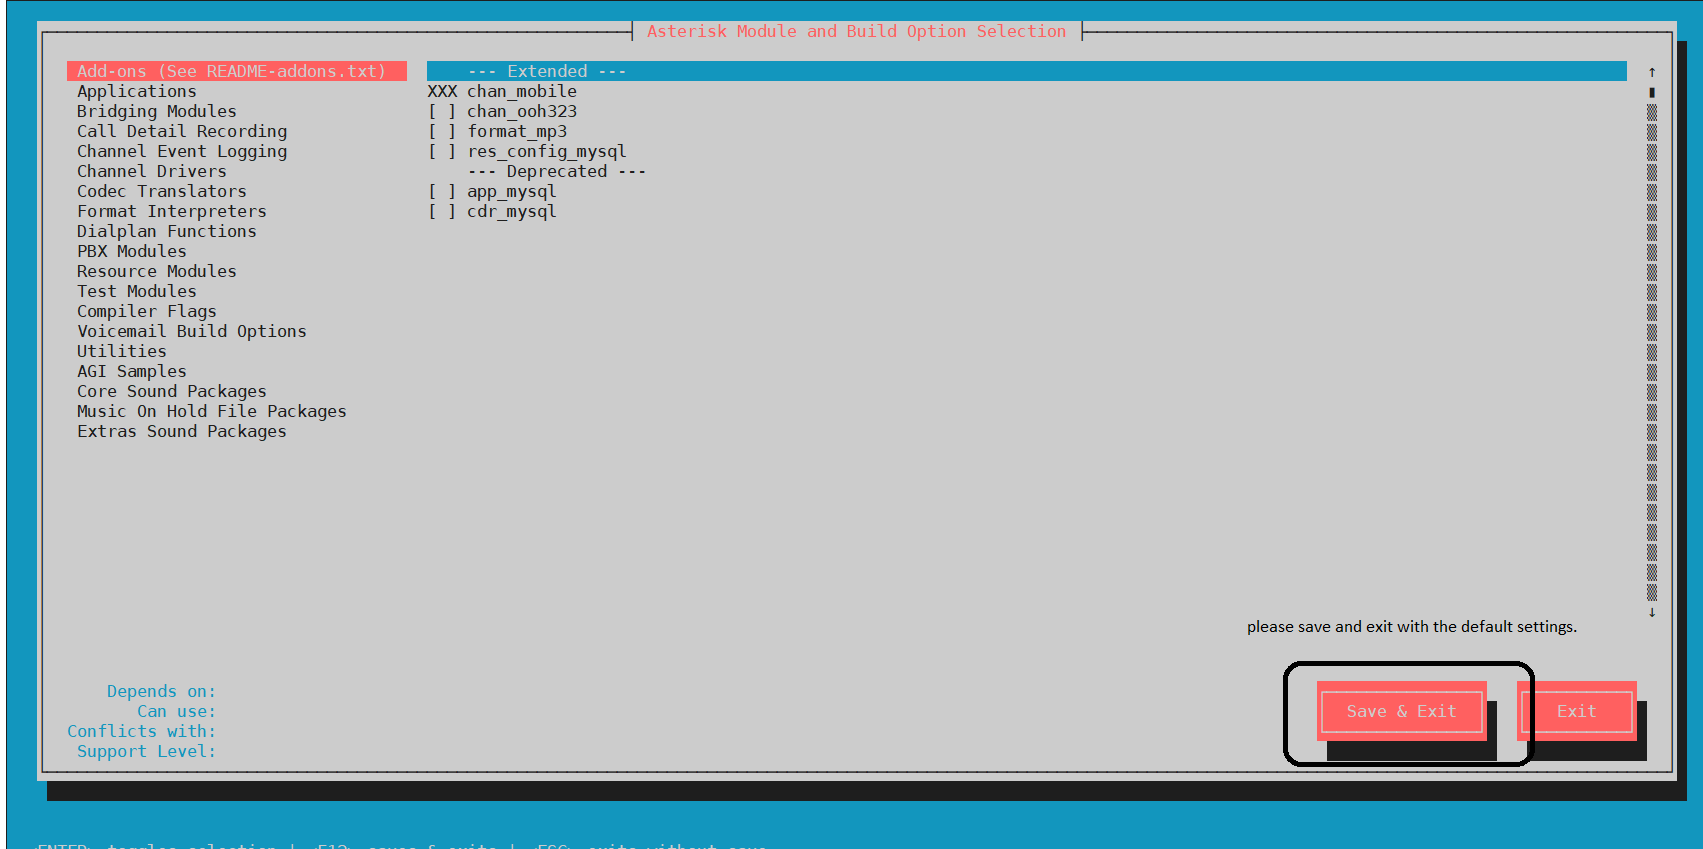
you should then see asterisk continuing to build for some time followed by the installation script changing the folder permissions and networking setup according to lineblocs requirements.
once all of this is completed you should get a confirmation that the lineblocs base installation was completed successfully.
you can then continue to install lineblocs using the web installer.
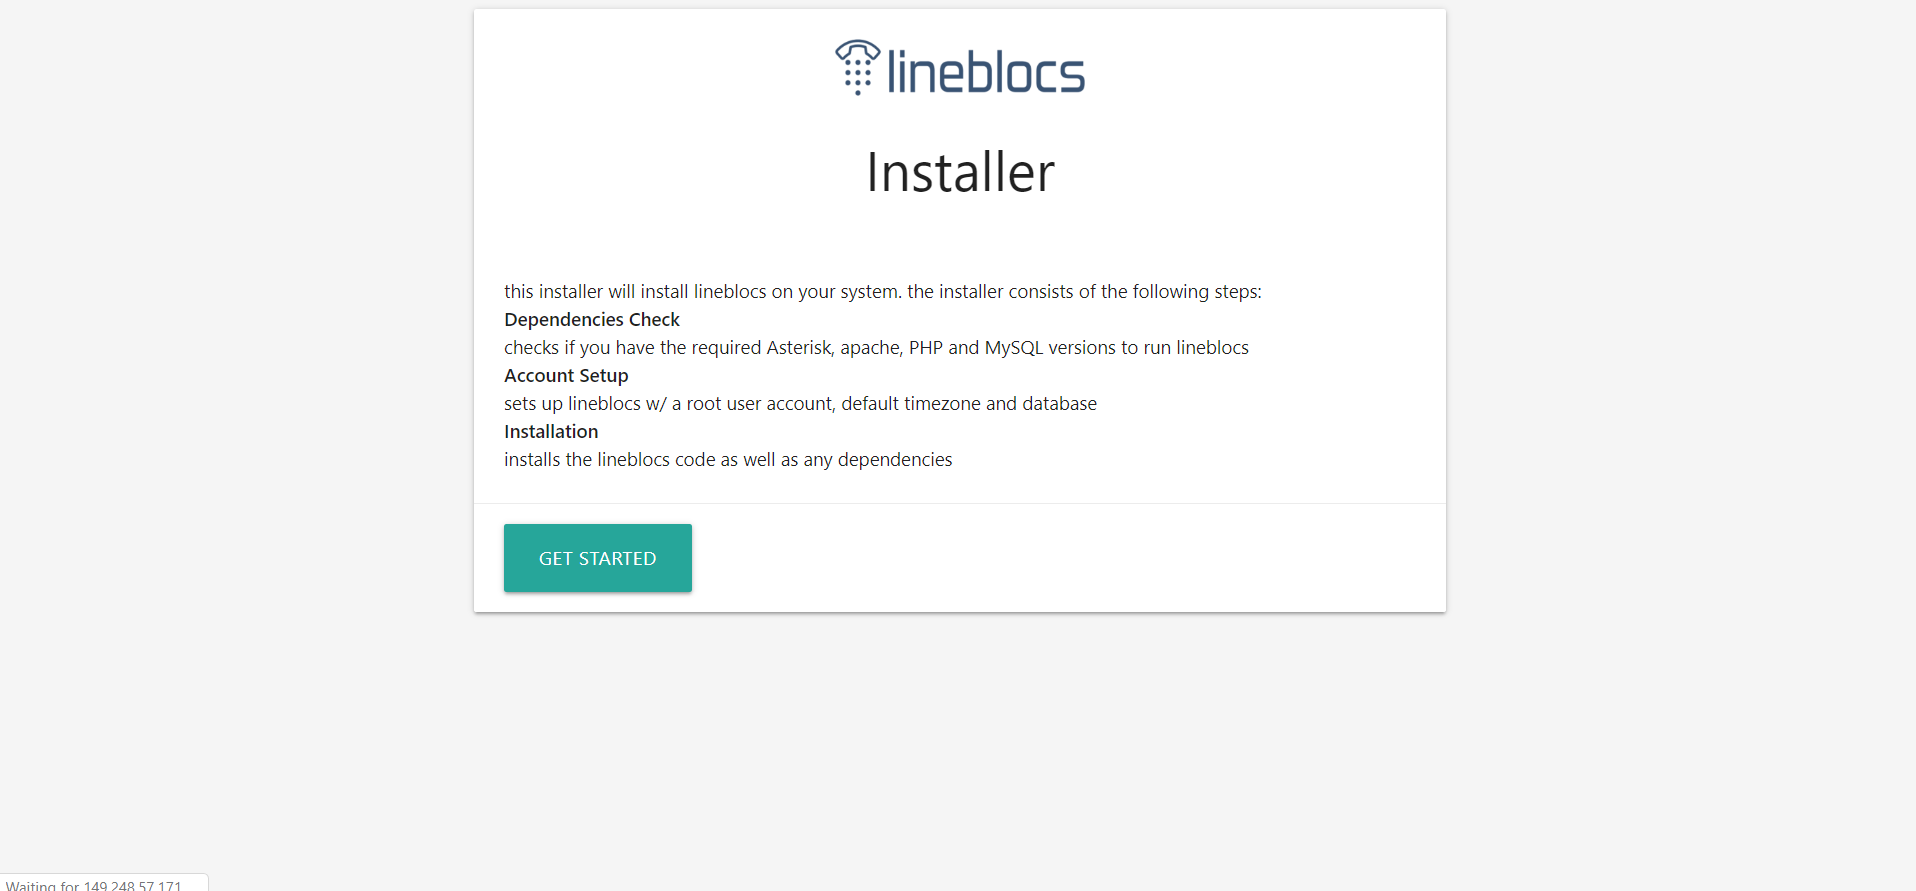
Running the web Installer
the lineblocs web installer includes a set of steps that help you configure the database, and asterisk for usage with lineblocs. when you downloaded the lineblocs code the installer was also downloaded. to run the web installer please use the following command:
```
./startwebinstaller.sh
```
you will be then given an address to use in your browser. please go to the URL in your browser to complete the web installation.
step 1 - requirements check
lineblocs installer will try to check if the requirements for lineblocs are met. you should have a screen as shown below. all the requirements will need to match in order for lineblocs to be installed correctly.
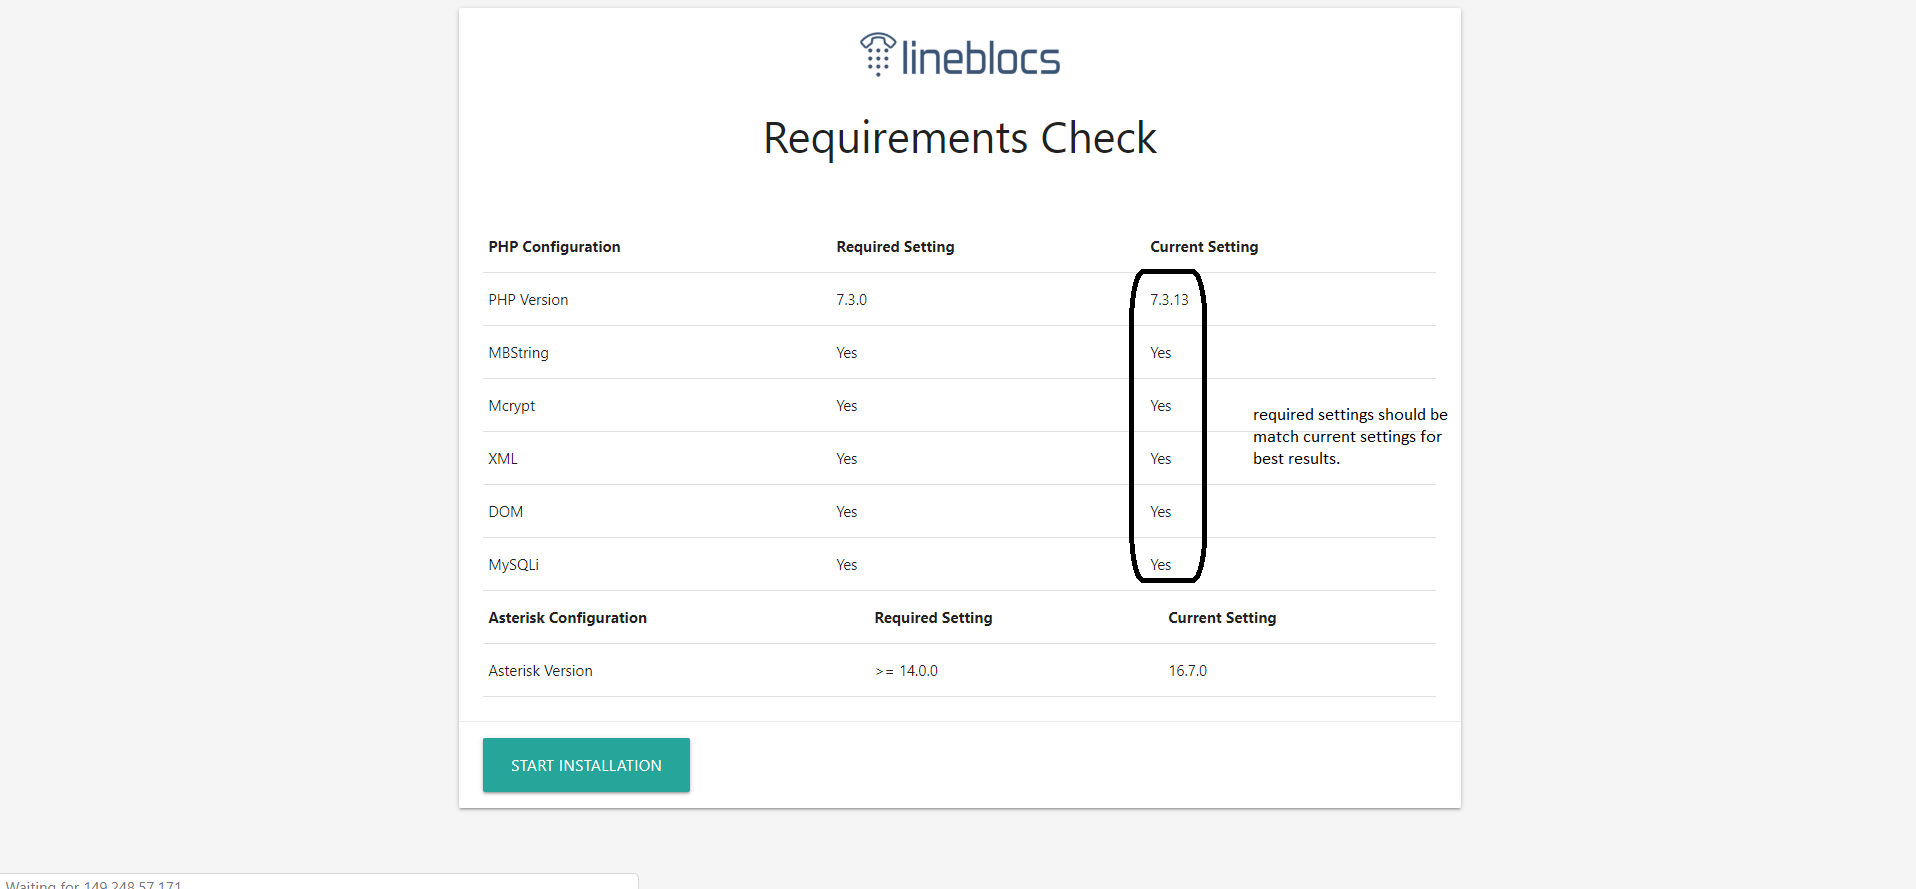
if the requirements look ok please click "Start Installation"
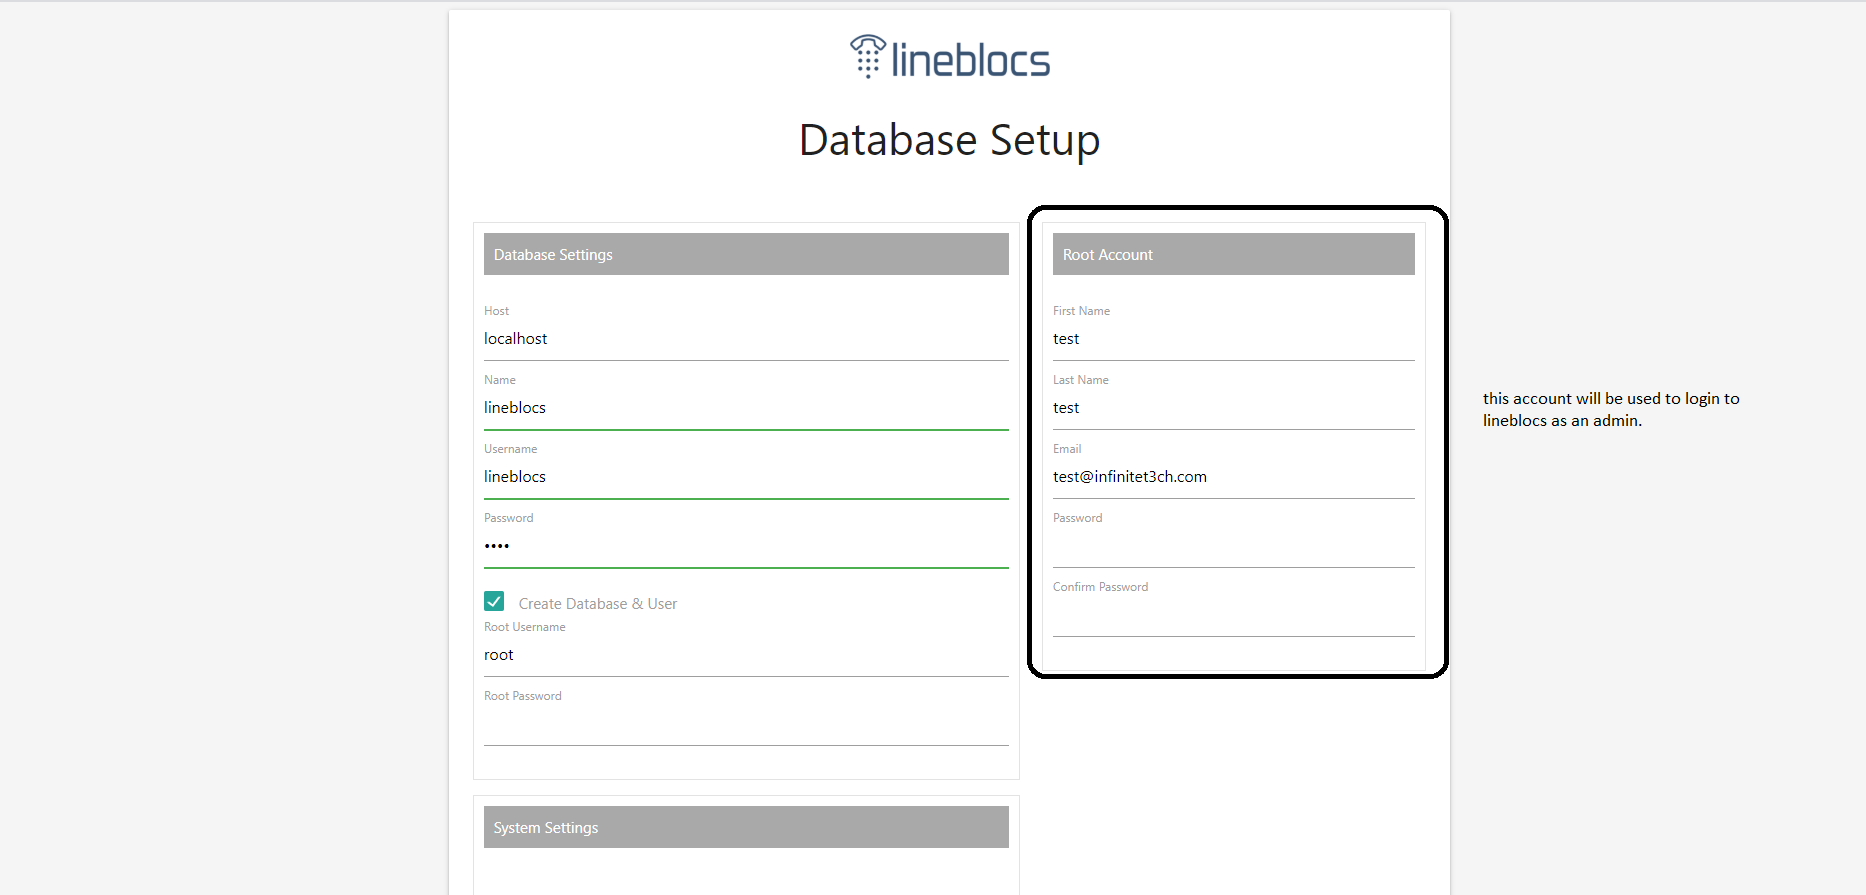
step 2 - database configuration
you will need to setup a database for lineblocs to work correctly. at this point in the tutorial we have already installed mariadb server as well as have setup the root account with no password. you can use the root account to create a new database called "lineblocs" with a username/password of your choice. the new database user will be assigned to the lineblocs database and also used in the lineblocs backend.
below is an example of how you might want to setup the database.
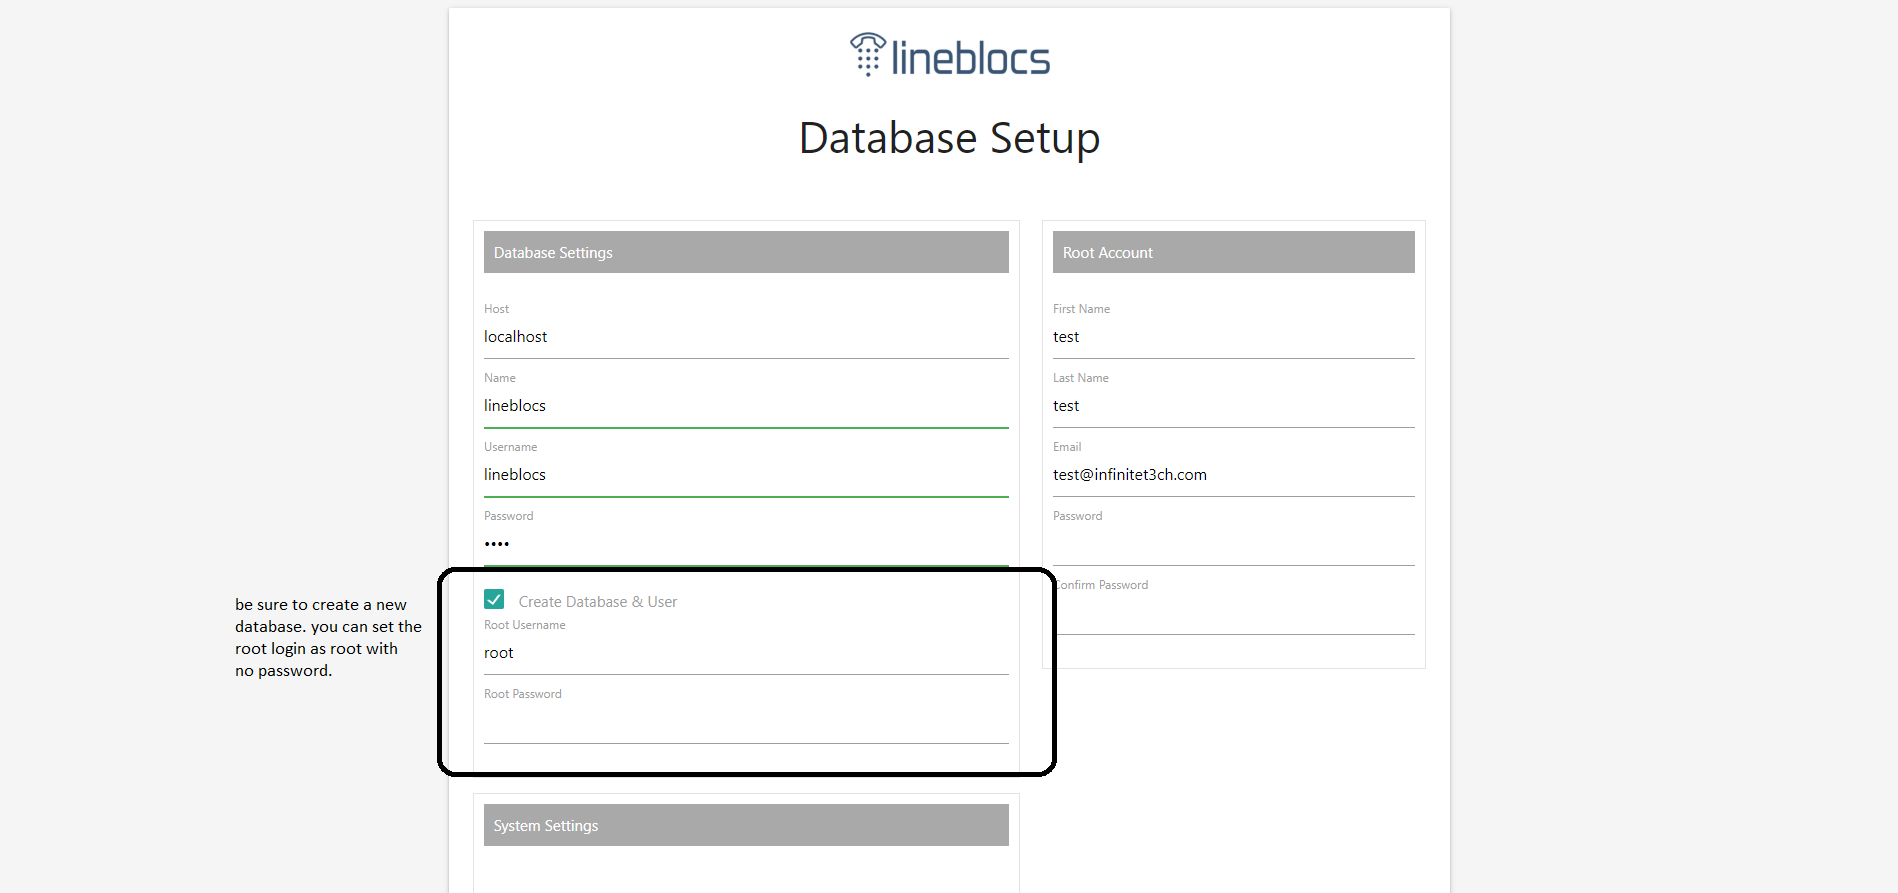
root account configuration
this sets up the main admin account you will use to login to the Lineblocs portal. this is also the main account or the "super" admin account that is given all permissions in the system.
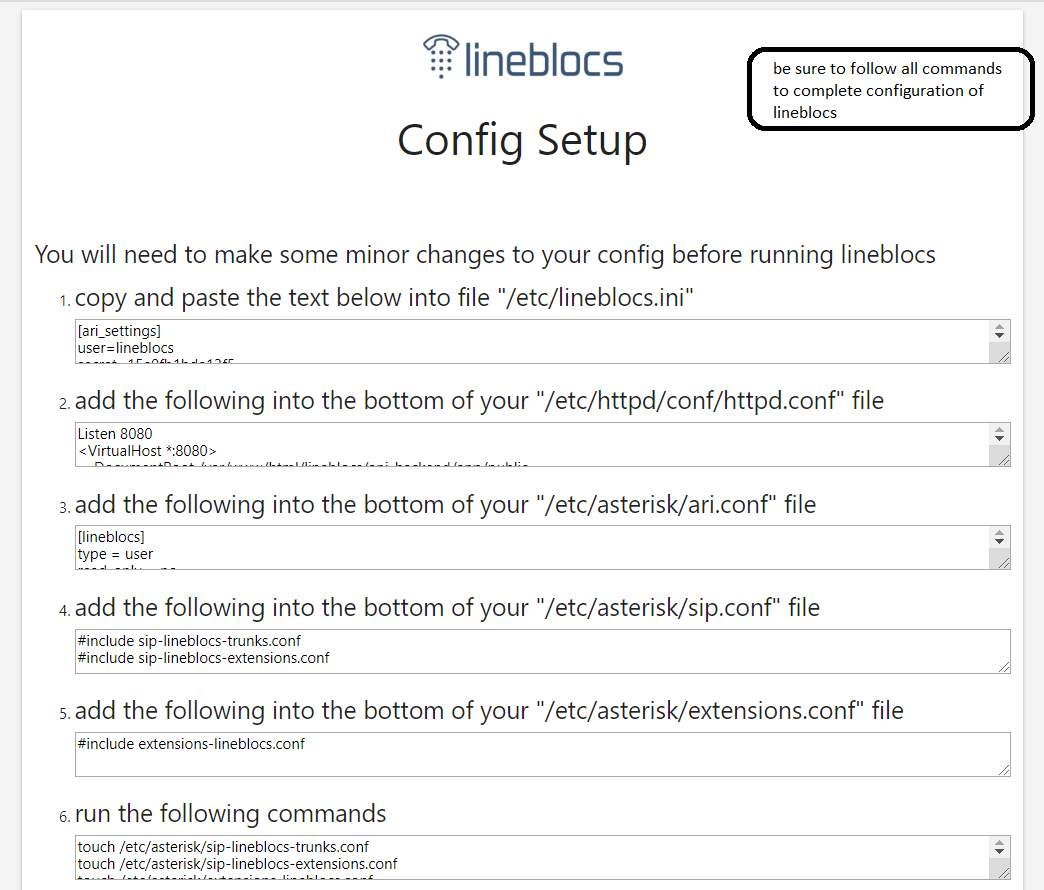
step 5 - Config Setup
some steps will be required to update the asterisk and Apache config to work with laravel. please follow steps below to complete Asterisk/Apache setup.
step 6 - install as linux service
in order to run the lineblocs backend you will need to install lineblocs as a linux service. please continue to follow steps as they are mentioned.
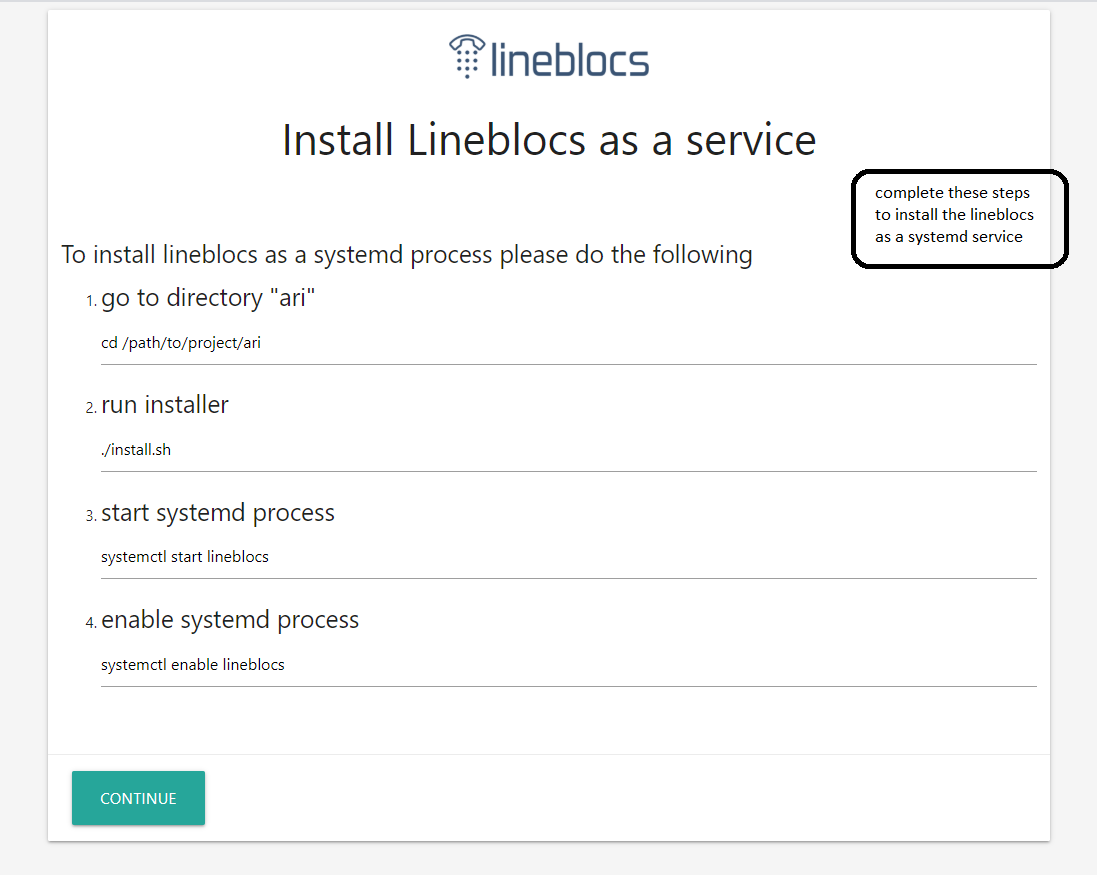
once you have done this lineblocs should be installed and enabled as a systemd process.
if you are having issues you you can verify lineblocs is running on the linux instance by using the command below:
```
ps aux | grep 'lineblocs'
```
you should see output similar to the following:
```
root 18665 0.0 5.4 1051036 46128 ? Ssl 06:45 0:00 /usr/sbin/lineblocs
```
if you don't see this output you can check the combined.log and error.log of lineblocs in "/var/log/lineblocs"
```
cat /var/log/lineblocs/error.log
```
this file should include any helpful info into debugging the problem.
you can also re-run the web installer by using the shell script included in the lineblocs distribution prune_installer_data.sh followed by running start_web_installer.sh again
```
./pruneinstallerdata.sh
```
```
./startwebinstaller.sh
```
step 7 - completing installation
once the installation and configuration is done you should be shown a message as seen below.
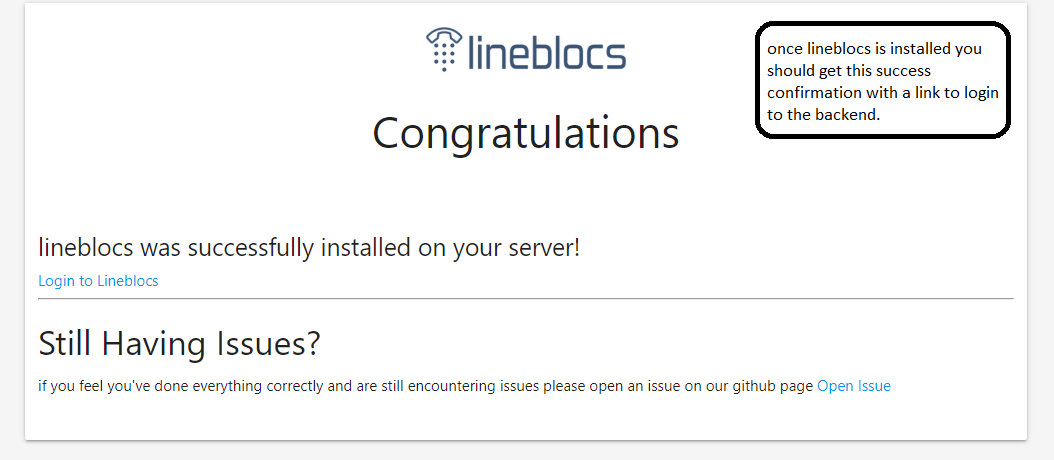
logging in the first time
be sure to follow the login link given in step 7 to login to lineblocs. you will need to use the account login you setup as the super admin to login.
Next Steps
this tutorial went over how to install lineblocs open source edition. for related articles be sure to check out the following.
Related Items

Still need support ?
We can help you with any questions you may have regarding this post.
Contact Us